Wednesday, July 30, 2014

Vehicle Profile: The German sIG Ib

I was playing an ASL scenario some time ago with a  friend of mine and we had a German Mobelwagen Flak vehicle in the countermix. He didn’t know what that was.  Now, he is a long-time ASL player and a history reader, but it occurred to me that there may be many people who play the games who don’t know what all the counters represent, especially some of the more esoteric vehicles. So in an effort to help remedy this situation, I would like to do a periodic Vehicle Profile of some vehicle I have recently played.  The first one up is the German sIG Ib, which I used in ESG#109, Backs to the Wall. 

Here’s the ASL counter:


Here’s a photo or two:


History and Development:
The Invasion of Poland had shown that the towed sIG 33 guns (sIG is German for heavy infantry gun) assigned to the infantry gun companies of the motorized infantry regiments had difficulties keeping up with the tanks during combat. The easiest solution was to modify a spare tank chassis to carry it into battle. A sIG 33 was mounted on the chassis of the Panzer I Ausf. B, complete with carriage and wheels, in place of the turret and superstructure.

Monday, July 28, 2014

Alphabetized ASL Chapter B Reference Chart


I'm not sure if this will help anyone, but I alphabetized the Chapter B terrain chart. For me it helps, because the order of the reference chart based on the order in Chapter B doesn't do much for me. Just thought I would share... Working on the other two terrain charts, too. If you find any errors, please let me know. 

ASL Alphabetized Chapter B Terrain Chart

AAR: ESG 109, Backs to the Wall


On Saturday at the 2014 St. Louis Tourney I played Jeff D. in Backs to the Wall, ESG 109.  I played the Germans while Jeff played the Brits.  I like early war scenarios because it seems that there is more need for combined arms tactics; the infantry must work with the armor in tight unison on both defense and offense.  In this one the Germans had to cross a densely built-up part of board 51 to then break out of the city and capture two bridges and a stone building between them.  The Brits had to delay the Germans long enough and hold just one of these key terrain features to win.  They got a couple of roadblocks, some light armor with some nasty armament, 9 squads and some support weapons, including ATRs.  The Germans got some Panzer I’s and II’s, 15 squads and some support weapons.  The bottom line is, I lost on the last CC dice roll.  I had one bridge and the building, with a sizeable force set at the canal line.  I had a 2:1 odds with a 9-2 leader leading the close combat to secure the last bridge.  I needed effectively an 8 to kill the Brit defender.  The odds were definitely in my favor.  I rolled an 11.  Ugghh.  But it was a great little scenario, and I learned a ton from playing this.  Jeff is a much better player than I am, but at least I gave him a run for his money. 

I have to apologize up front that I was so busy with the game that I didn’t take any photos or even take any notes.  But I’m going to walk through the scenario and then give my “lessons learned” at the end.  SL was the second game I ever bought and played back in 1980 (I even have the original game with the receipt inside the box!), but, due to real warfighting, spy work, a civilian job and a beautiful family, I’ve only been seriously playing ASL about 4 years, off and on, so these lessons may be obvious to most of the experienced players. 


I set up at the forward edge of the battle area (FEBA, row 7 on map 51), so that my infantry would be across no man’s land and up to his FEBA on the first turn.  I used the sIG Ib to lay down fire to cover my move.  At the end of Turn 1, most of my units were in the stone buildings on hexrow 5 at least, shooting at his troops in the stone buildings.  I was able to get a couple of luck shots, but nothing much.  I just wanted to move and get my guys in position.  On turn 1 I could see the road block in Z2. 

I jumped up pretty quickly so in his turn 1 the Brits started moving a force of theirs back to eventually position themselves on both of the bridges.  The goal was to get to the 23F3 building and on the bridge at 23P7 within a couple of turns.  The Brits still left a good number of units in the stone buildings to hamper my movement. 

Thursday, July 24, 2014

Critical Hit Omaha East/West Monster Review

I just received the CH Omaha East/West Monster pack and thought I would do a little review. So I ordered this on Friday and got it in on Monday, no joke. Shipping was quick. The pack contains the rule sets in color for both Omaha East and West, all of the scenarios and set up cards, a color landing craft play aid that is really nice, and 27 map panels for Omaha West and 28 for Omaha East. The map panels have very large hexes, maybe a good 50% large than the standard hex size on my Omaha West 2nd edition paper maps. And the panels are gorgeous... I mean they are really nice. Bright crisp color, no smearing or other color imperfections. Here are some pics:


A close up of the map panels:


The package as it was delivered in the Priority Mail box.


Another view of one of the map panels:


Two shots of the map panels compared to the paper map in Omaha West.  Note the larger size of the map panel hexes.  


About 2/3 of the Omaha East map set up on my floor.  This thing is huge!  The map panels seem to fit together nicely, though not perfectly.  But then again, this was a quick setup. Imagine Normandy at the squad level.  Whew!


My assessment: Was the Omaha Monster pack worth the $140 I paid for it? Well, I think so, and here's why. I am a huge fan of D-Day and Normandy games, and playing the invasion in ASL has a big appeal for me (no pun intended...). Anyone who is familiar with the battle knows that the success of the invasion was due to small units taking the initiative, overcoming incredible odds, and all of the little victories adding up. What better way to play this than with ASL?! The hexes are large, and the map is beautiful. The map panels do not require trimming, and just in my preliminary and quick assembly, the alignment was spot on. The assembly did take some time, as there is no chart and the maps are not numbered, so you lay them out by the hex numbers. Being familiar with the terrain also helped.

The rules have a few places that are a bit confusing, especially in the landing area. But I handle this like I handle all other decisions in life - study it a little, then go with what you have. You can spend all of your time getting it 100%, or going with 85% and moving out. I prefer the latter. When I played Omaha West, I'm sure I got some of the landing rules wrong, especially with regards to the beach obstacles. So what! (Sacrilege, I know) but the game was fun and it seemed to flow well.

Will I ever play this whole thing at once? I actually hope so, but I don't see how. But you can bet I will try!

Overall, yes, it was worth the investment. Especially as a D-Day fanatic.

ASL Vehicle and Ordnance Cards


Do you ASL players remember those ASL vehicle cards that came with Deluxe ASL?  Or have you played any of the Yaquinto games like Panzer or 88?  Or Avalon Hill’s MBT or IDF?  Or GMT’s Panzer revision?  Or even ATS?  I liked the vehicle cards, which contained all of the pertinent information regarding each vehicle.  These were great resources that, for me, helped with game play. 
Well, now ASL has its own set of AFV/Ordnance cards, courtesy of Dr. Chris Edwards.  Go to his website www.aslcards.com to see more info and order them.  They are $25 for the main nationalities and an extra $5 for the Allied and Axis Minors.  Very much worth the small cost, especially given the effort it must have taken to produce these.    
These cards come in pdf format, with two cards per page.  Every nationality is represented.  Information such as armor factors, movement points, ammo types, target size, gun type, mechanical reliability, open/closed top are all there.  Also included are To Hit tables for that specific weapon, and basic To Kill numbers for the weapon and ammunition used.  The Vehicle Number corresponding to Chapter H is also included next to the Vehicle Name. The cards are well-laid out, very readable and highly useful. 
I got a little intense and printed out every one on double-sided pages, laminated each page, cut out the cards and use them to play.  I find them very helpful since all of the info is on the card (including a picture of the counter).  I can reference the card instead of looking at the counter.  I don’t have the specs of every vehicle memorized, so these cards come in handy. 
Highly recommended. 

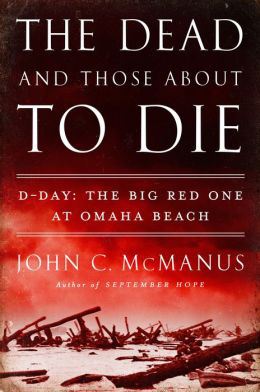
Book review: The Dead and Those About to Die, by John McManus


I have always been fascinated with the Allied invasion of Normandy, called Operation Neptune. I saw this book recommended by Albert Mohler on his Summer Reading list for 2014, and I immediately picked up the book. I couldn’t put it down. The book focuses on the 1st Infantry Division’s assault on Omaha Beach on June 6th, 1944. The title comes from Colonel George Taylor, commander of the 16th Infantry Regiment and the first unit to land at Omaha, when, under extreme fire, was walking around the beach prodding men to get off the beach. “There are only two kinds of men on this beach, the dead and those about to die. So get off this beach!”

As a West Point graduate and a combat veteran, I can say that this is one of the best books on D-Day I have read. McManus joins only a few others who have not only written good history, but enables those who haven’t been there to get just a bit too close to the action. One cannot read this book and not be moved, emotionally and mentally, by the heroic actions of not just a few brave souls but the many who assaulted this beach and held on in spite of the odds. Moreover, this os one of the few books that focuses on the role of the Big Red One specifically and their area of the beach. There are several books that focus on the 29th Infantry, but the 1st Division’s area was just as bad. This book contains a lot of detail, has some really good and clear maps, reads quickly, and flows smoothly. However, I had to stop several times as I couldn’t read the words for the tears in my eyes. Many of us have come dangerously close to forgetting the bravery and determination of those who sacrificed so much on a small strip of sandy and rocky beach on the coast of France in 1944. They should never be forgotten. Thanks in part to this book, they will not be.

For those who love small unit actions on Normandy, this is the book for you.  McManus describes in detail many different tactical vignettes by individuals, squads and platoons who were instrumental in securing Omaha Beach and moving inland.  This book is a great complement to Critical Hit's Omaha East.  Additionally, the book contains enough maps and detailed descriptions to help designers come up with a few good ASL or ATS scenarios featuring the Big Red One on June 6th. 

Highly recommended.